Sunday 30 June 2013

Photo a day....these are more interesting.....honest!!

I expect you are bored rigid looking at the mundane things that are my life. But these are more interesting pics....honestly!!

June 23rd; Meet Miss Babs...she is a pedigree Welsummer, well known for their poor "mothering" skills as hens; guess what.....she is broody!!! Therefore she is not laying. Damn hen!!!

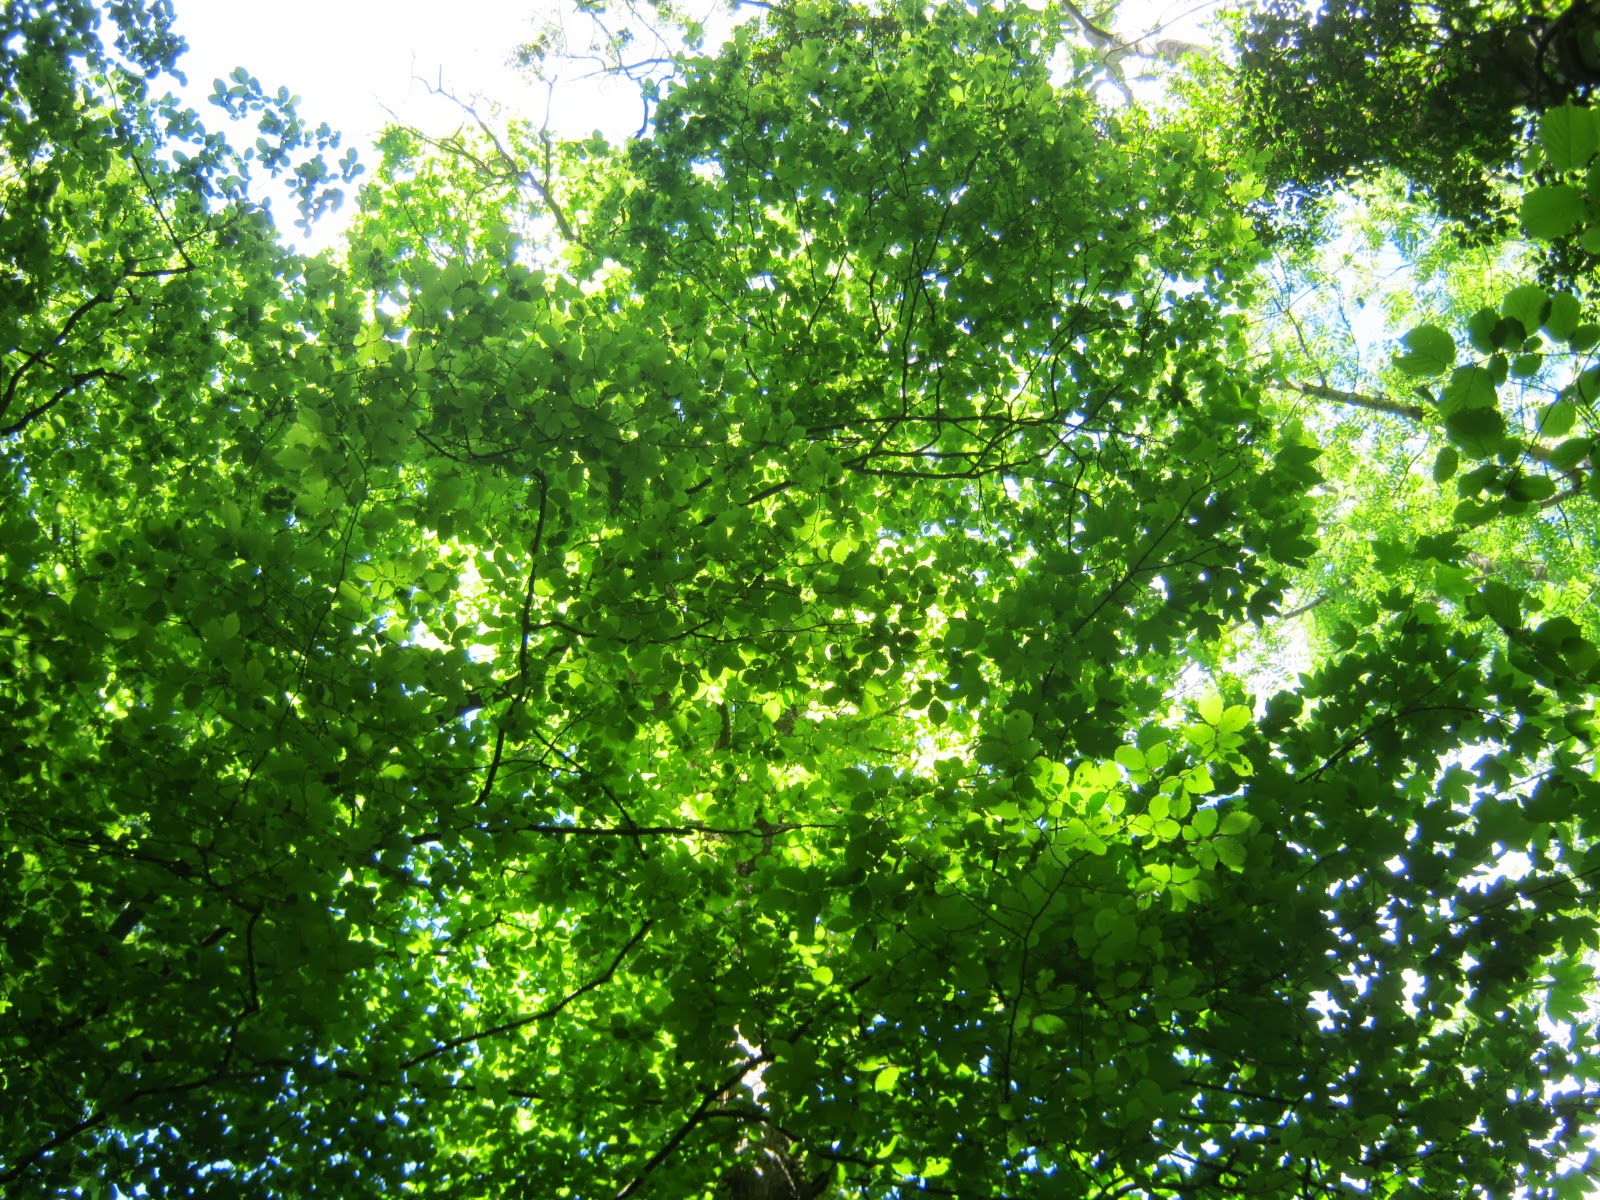
June 24th; Forest school. I LOVE my job... I actually get paid to visit places like this. Ok so I have to supervise children but it really is a GREAT job!!

June 26th; Katy went to Tunbridge Wells and bought everybody a liquorice catherine wheel. I'm sure they were much bigger when I was a child....

June 27th: I got to use my minibus licence and drive Yr Two to a sports festival at a local secondary school. It was great fun actually!!!

June 28th; We are off to Guide camp tomorrow so my lounge is full of food and kit ready for the off.

June 29th; A real last minute pic! I got into bed on camp and suddenly realised I hadn't done my pic for the day so this is my bed; I'm in it; looking towards my feet!!!

June 29th; Still on camp. Tonight the girls played a Wide Game where they each earnt a glow band for a correct answer. Then they all sat round the camp fire for hot chocolate wearing their glow bands around their necks which made a great pic!!

June 30th; last day of camp and we actually woke up before the girls. This is a shot of our tent in the early morning sun (well 8am), in the momentary calm before the hectic day of packing up!
Posted by Picasa

Tuesday 25 June 2013

University Open Days; Part 1 Reading!

So we begin the round of University visits again, second time around, for Katy this time. She wants to study Chemistry, a course called MChem with a year in industry so we are off to visit 5 Unis that offer the course.
First off was Reading. We went there by train; nice easy journey apart from the freezing wind and rain!

Stop for lunch in one of the campus restaurants whilst we decide where to go next.

Rather groovy chairs so scores points for these....

Nice freebie bar of chocolate in the goody bag....def extra points!

We decided to score each University on the quality of the freebies they give! Pretty good score with this little stash for Reading I think.

But the MOST exciting thing about Reading was the buses! Each route has a different colour bus!! This was the orange route bus...

...and the claret bus (note: it's not red) which is the one we had to get to the Uni....

...pink route....

.....scarlet route....

...blue route...

...green route.....

...and the purple route!We also saw a bronze bus, a black bus, a yellow bus and a dark green bus but I didn't manage to snap them successfully! I wish we had such pretty buses; wouldn't it make going on a bus journey sooo much more fun?
Posted by Picasa

Sunday 23 June 2013

Photo a day

Still catching up so a few extras this week...

June 9th; in 1977 we moved into our brand new house that my Mum and Dad had built. We are the only family who have lived in it, Dad moving back in when they divorced and finally the time has come for it to be sold. We all went there for a farewell to Applehurst meal and my Aunt and cousin were there too; quite an upsetting event.

June 10th; Forest school and today we were looking for evidence of animals. I loved this almost spiral in a rotten tree stump where a squirrel had eaten some sweet chestnuts.

June 11th; This intriguing bud caught my eye as I walked into school.

June 12th; The day that Max had his eye removed. As soon as we went to get him we could hear his tail banging on the walls of the vets corridor! He was so pleased to see us and immediately we had the old Max back! I am delighted to report that now we are a week on, he is having his collar off when we are there to watch him and is back to normal. He just has to be careful moving about when his cone is off as he tends to bump into the door frames!

June 13th; More progress on the scrap quilt, a brown square.

June 14th; The view under the tunnel protecting our new seeds. They have grown really quickly.

June 15th; Finally flowers are opening in the garden. They are suffering from the constant wet though and the outside of the roses are brown before the middles are properly open.

June 16th; Eliza was doing her own patchwork, I think it is going to be a dog.

June 17th; Forest school again and this week the children got to make their own animal trails using stencils and flour shakers.

June 18th; we had a school trip to Batemans, Rudyard Kiplings house in Burwash just up the road from the school. There were lots of great activities and we also walked around the grounds looking at the insects.  One of the children spotted these damsel flies laying eggs in the pond.
Posted by Picasa

Friday 14 June 2013

Photo a Day.

Sorry...did you miss me? I have had the most horrible week but I will tell you more later. Without further ado, on with the next week...

June 1st; Progress so far on the Granny Stripe blanket that I am doing for Jess.

June 2nd; a rare moment of sunshine that Minnie decided to snooze in.

June 3rd; Our first Forest School session. Beautiful, warm, sunny day with the blue sky just visible through the leafy canopy.

June 4th; after he hoed up my last lot of seeds Ken replanted them along with some runner beans.

June 6th; started a new scrap quilt project. Step one, sort your colours.

June 7th; The cause of my horrible week. Ken took Max for a walk today, called him and he came back with a small yelp and lay on the ground. When Ken looked his eye was the size of a tennis ball and almost out of the socket. Off to the vet, who referred him to a specialist eye hosital. They think it is a severe trauma injury from a blunt instrument like a kick or somebody hitting him or as a result of a car accident. Well he was only about 50ft away from Ken when it happened, down in the woods with nobody anywhere near so we can only think that it was a deer kick. I guess we will never know. He will need several more visits....

June 8th; my car clocked up 90,000 miles today. It only had 10 miles on the clock when we got it so we've been a long way together, me and my car.

June 9th; I went to a workshop at Mazelino's in Hove. It was all about personalised gifts and we made these cute little bootees. Mine is the yellow one with the flower on the front and the pearls. We also made felt brooches, great day that helped me take my mind off poor old Max.
Posted by Picasa

Friday 7 June 2013

Part Two....

Now I will show you how I finished my quilt!

I chose to back it with fleece so lay it out on the table WRONG side up. Lay the denim RIGHT side up on top of it, making sure it is all square and straight. I found that the stretch denim could pull it out of shape a bit at this point so don't pull it about too much.

Now you really do need to tack. If you have quilt pins then use those but I tack; down the middle, at 90 degrees to that and then in stripes along the short side. It is tedious and hard on the fingers but is well worth it as it does slip about otherwise.

As my quilt had "raggy" seams I decided to finger press the seams apart and stitch right in the middle. This would allow the seams to continue to fray. It also meant that I wasn't accidentally catching down the pockets that I wanted open! If your quilt is flat then it is up to you where and how to quilt but I also think it looks nice if you stitch 1/4 inch to the left and right of each seam. 

To finish it off you need to decide how to edge it. You may choose to bind it like a conventional quilt and there are many instructions on books and the 'net on how to do this. I chose to continue my "raggy" theme and leave it unbound. To form my edge I stitched a 1/4 inch in from the edge before trimming the fleece close. Hopefully the edge will go ragged to match the middle seams too.

I love the way the pockets can still be used..... To start the "ragging" process wash your quilt and tumble dry. The tumble drying will fluff up the fraying edges BUT keep an eye on the lint collecting bit as I think they can cause the dryer to overheat if they get too full. I check mine about every 1/2 hour or so. Don't worry if you don't have a tumble dryer, use will give you the same effect over time! 

Finished quilt! A drapey shot because Katy has taken it away to her lair and I haven't seen it since!
Oh, and someone did tell me that stretch jeans don't go as ragged as normal ones. No idea if this is true so I guess I'll just have to see!
Posted by Picasa

Thursday 6 June 2013

A recycled quilt....

If you have been a reader for a while, you will know that I like to make quilts from old jeans. I made one for Jess from all the baby denim and then one for Eliza and lastly one from old camo trousers for my son. Katy, as ever, is the picky one and wanted a black one so it has taken a while to save up enough in the correct colour. So here is my step-by-step;

Collect a variety of old, clean jeans or other denim items. It is hard to be exact about quantities because it depends rather on the size if them! But as a rough guide, I can get 20 squares out of an adult pair. That is not a skinny pair and the squares are 6 1/2 inch.

Decide which leg seam you want to have in your square. By that I mean the inside leg double stitched one or the outside leg, plainer one. Then cut up the leg to about level with the crutch and lay the leg out flat. Don't cut all the way up because you will need to have a bit of room to fit in squares around the hip part. Then trim the bottom edge so that it is straight...

Work your way up the leg, cutting 6 1/2 inch squares. I was getting two across each of these legs. As you near the top you will need to re-straighten the leg.

When you reach the top, use a square patchwork guide to work out the best way to preserve the decorative parts like pockets and trimmings. Cut through all the layers and I find a rotary cutter is really the best way to go.

Then tack your cut pockets to give support until you assemble the squares. At this point I like to sort my squares into three piles; plain, seamed and fancy so that I get an idea of the ratios I need. Keep cutting in this way until you have enough for your chosen size. If you have tons of plain ones now would be the time to add some decoration to them in the way of buttons, ribbons, applique etc. Press them.

Next step is to lay them out in a "pleasing fashion". This can be mathematical, random or however you like but I find that it helps to take a black and white pic as it shows the contrasts more clearly and enables me to see any areas that are too dark/light.
Now it is a question of joining them all together; first across the row then join each row to the one below. Before you start to stitch just 2 things to do;
1. choose if you want your seams "in" to give the usual smooth finish, or "out" which will give a lovely ragged finish as the quilt washes and wears
2. FIT A DENIM NEEDLE! If there is just one thing you must do, it is this. I broke two needles on the first denim quilt I made and it doesn't do the motor much good either.
Now sew!
Posted by Picasa